If you do a YouTube search for "flat diaper folds," you will end up with over 5,000 results. There a dizzying array of choices for folding diapers: airplane, anteater, diaper bag, origami, Jo's fold...it can feel overwhelming to try to choose where to start.
To be honest, I haven't tried them all. I went through a couple of videos and tried my hand at a few:
- Trifold
- Triangle
- Bikini Twist
- Angel Wings
- Kite
- Airplane Fold
- Origami
- Diaper Bag
I'd already been doing the Diaper Bag fold when I used flat, so that was an easy choice for the challenge. They stay folded well in the diaper bag (thus the name) and are easy to put on. The trifold (also known as a padfold) works just the way we use prefold diapers on our toddler (and baby, now that solid foods have been introduced). After watching a video of Norland College, the premiere nanny school in England, I decided to try out the fold they use: Origami.
Like I said, there are plenty of YouTube videos that walk you through, step by step, but I decided to do photo instructions for my three favorite folds. That way you can learn even if you are stuck with a sleeping baby!
 |
| All folds start with the flat diaper open on the table. |
Diaper Bag Fold
For smaller babies or very large flats, start by folding up the bottom third. This is also great if you have boys or tummy sleepers, as it adds another layer of absorbency in the front.
Fold in the left edge, bringing it to the middle.
Bring the right edge to the middle.
Fold up the bottom again so that the diaper's rise will fit your baby (usually up to around the belly button).
Bring in the bottom left to the middle.
Bring the bottom right into the middle, overlapping the left edge.
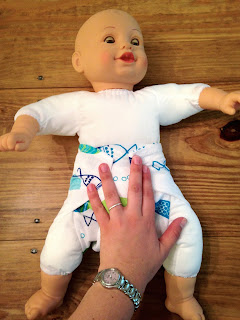
When you put diaper on your baby, fold the bottom up between baby's legs...
...bring in one wing from the left...
...and the other from the right.
Use a Snappi or pins to secure the diaper.
For added security against blowouts, roll the edges of the legs in (see arrows).
Trifold or Padfold
Start with the diaper open, as before.
Fold the diaper into thirds, horizontally
Fold the top edge down to meet the bottom edge.
Fold the diaper in half.
Lay the diaper in a cover. If the cover has flaps, you can tuck in the edges. If it's too long, fold down the back or front (front for boys/tummy sleepers, back for girls).
Origami Fold
I ended up not preferring this fold during the day, but it worked out great for nighttime because I was able to boost the absorbency with a receiving blanket.
Fold the bottom edge to meet the top edge.
Fold the left edge over to the right, so you now have the flat folded into quarters.
Grab the top layer at the top right corner and pull it straight left.
You'll end up with a triangle over a square, like this.
Flip the whole thing over.
Grab the left edge of the square and fold it in half or thirds.
If you are going to add a layer of absorbency, lay it in the middle before folding over the square.
You can tuck the edges under your booster layer.
 |
| Here you can see how thick that center layer is for nighttime |
Bring up the bottom edge.
And fold over the wings.
 |
| For a smaller baby, roll down the back edge before putting it on baby. |
As with diaper bag fold, you can roll in the legs for added protection.
Here you have all three folds, shown ready to go. I fold all of my flats ahead of time. That way, when I have a squirmy baby on my hands, I can make the diaper change as quickly as possible. Left to right: padfold/trifold, origami, and diaper bag fold.


No comments:
Post a Comment